
|
|
|
Only search this website |
![]()
![]()
| Plug n Play |
|
Note: Laptop users this page does not apply to you. Please proceed to Page 2.
Before Windows 95 if you wanted to add a
new hardware device to your computer you would have to go to
Add Hardware in the control
panel and tell Windows what hardware you added.
Beginning with Windows 95 a feature was added to the
operating system that allowed it to recognize added
hardware. This feature was called Plug n Play (PnP).
Today known as Universal Plug n Play (UPnP).
Plug n Play doesn't mean you simply add the new hardware and
Windows takes care of the rest. You still have to
participate in the process. In this section we'll go
through the hardware installation of a device or two.
I'll show you how to install an expansion card inside your
computer, an external device (such as a printer), and walk
you through the Windows installation process.
Note: Opening the case of your computer will void
your warranty. If your computer is still covered you
may want to call for repair/upgrade. If not, proceed
with caution.
STOP!
Static electricity can fry your motherboard without you even
feeling the slightest zap.
If you are not comfortable working inside your computer,
take it to a pro. If you decide to try, make sure you
are grounded and working on a clean, dry surface. Try
to avoid working on your computer in a carpeted area as
carpet generates static electricity. If your kitchen
or dining area has no carpet, use your counter or dining
table as your workbench. Okay, grab a Philips-head
screw driver and let's get started.
INSTALLING AN EXPANSION CARD
Check your computer documentation to find out what kind of
slots your computer has. If you do not have the
documentation you may have to open the case to determine
which slots you have and if you have any available.
You'll want to make this determination (and note your
operating system) before you purchase your expansion card to
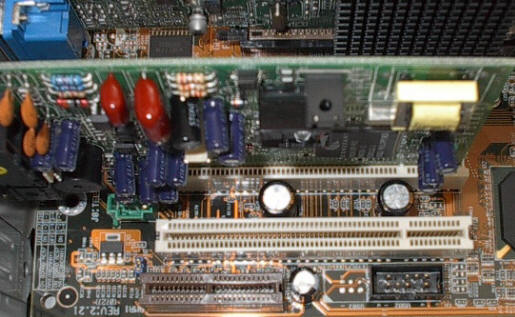
ensure it will work with your system. The white slot
pictured below is a PCI slot. This is where we'll
install our new card.
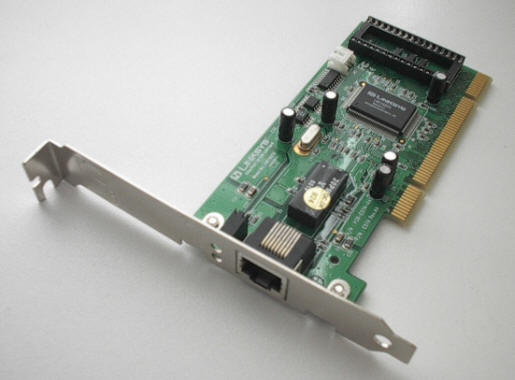
The card pictured below is a PCI network card. Notice the little metal teeth on the bottom edge of the card and the break in those teeth that match the above slot.
-
With your computer off, unplug the power, monitor, keyboard, mouse, and anything else you have plugged into the case.
-
Take it to the location you decided to use as a work area and open the case. (Consult your computer documentation if you're not sure how to open the case. Different manufacturers seem to put their cases together differently.)
-
Before you jump in there, push the power button on your computer case for about 5 seconds. You may (or may not) hear a slight noise or see the LCDs on your motherboard light up just for a second. You do this because your system holds a bit of electricity in it even when you've unplugged it. Holding down the power button with the computer unplugged discharges any electricity lingering in the system.
-
Now touch the metal frame of the computer case to discharge any static electricity you may have.
-
Remove the screw holding the slot cover plate next to the empty slot where you plan to install the new card. You may want to hold the card (by the edges) over the slot where you want to install it so you can see which slot cover plate needs to be removed. Keep the plate you remove in case you need it later.
-
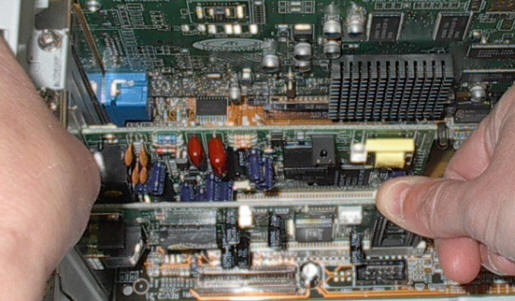
Line up the the card with the slot making sure the cover plate on the card is also lined up where the cover plate you removed was. Be sure not to touch the components on the card or the metal teeth on the bottom of the card that go into the slot.
-
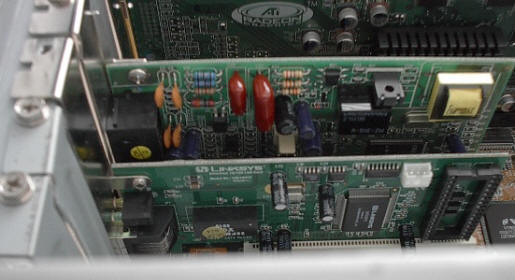
Using your thumbs on either side of the top edge of the card, firmly press the card straight down into the slot until it's completely pushed in. (This card was small and hard to get to on the left side so instead of pushing from card edge on the left, I used the slot cover plate.) Make sure the card is sitting evenly and the cover plate sits correctly over the hole to the back of the computer.
-
Screw the plate down.
-
Replace the cover to the case and return the computer to it's place.
-
Plug all of your components and accessories back in and turn the computer on.
-
(Next step, software installation)
![]()
The Beginning
Wizard of OS
Plug n Play
Internet & Networking
Care & Maintenance
Tips, Tricks & Tidbits
Troubleshooting
Tools & Info
Albums
Blog
Disaster101
Dugout
PC101
RambleCamp
Tip Jar
Contact
About